
Description

A versitile and intuitive toolset for retiming your animation.
- Experiment with timing changes non-destructively.
- Easily bake out your retimes, no matter how complex.
- Shuffle your keys! Instead of baking out every key, this feature shifts your existing keys into your the timing.
- Create any number of retimes in your scene.
Use the Package Manager for quickly installing and updating tools, get it here:
Package Manager Getting Started


The Retime Control connects directly with Animation Curves, not objects, so be sure to make sure you have some animation keyed already.
The retime tool does its best to find related animation based on the objects you are adding. This included Animation Layers and Constraints.
This works as well but you will need to remove the expression on the camera node frame attribute and replace it with keyframe animation that drives the frame. We are working on a solution where you wont need to do this eventually.
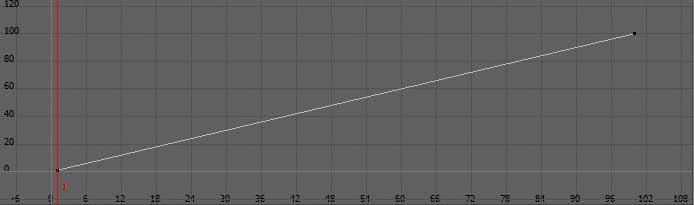
- This is the default curve and your animation will appear unchanged. Resetting will go back to this.
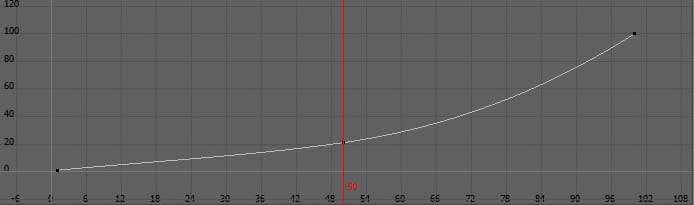
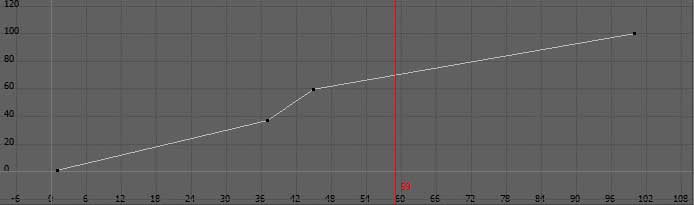
- In this example the animation begins slightly slower and then gets faster near the end. The start and end frames have stayed the same.
- Here we are speeding up a small section in the middle. Since we are keeping the start and end frames the same, the beginning and end will slow down slightly.
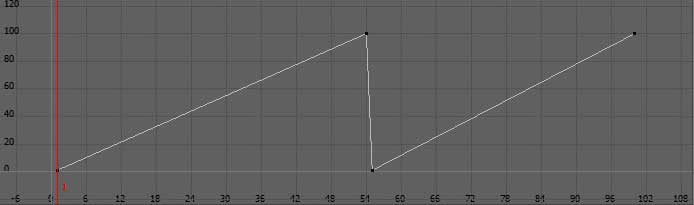
- Its possible to create loops or hard cuts in your retime by doing this.
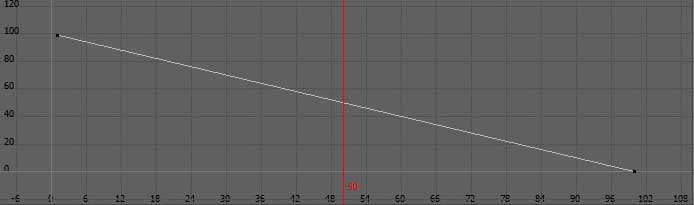
- Here you can see the curve going in a reverse slow.
- You can even have your animation play forward and then in reverse all in the same retime animation.
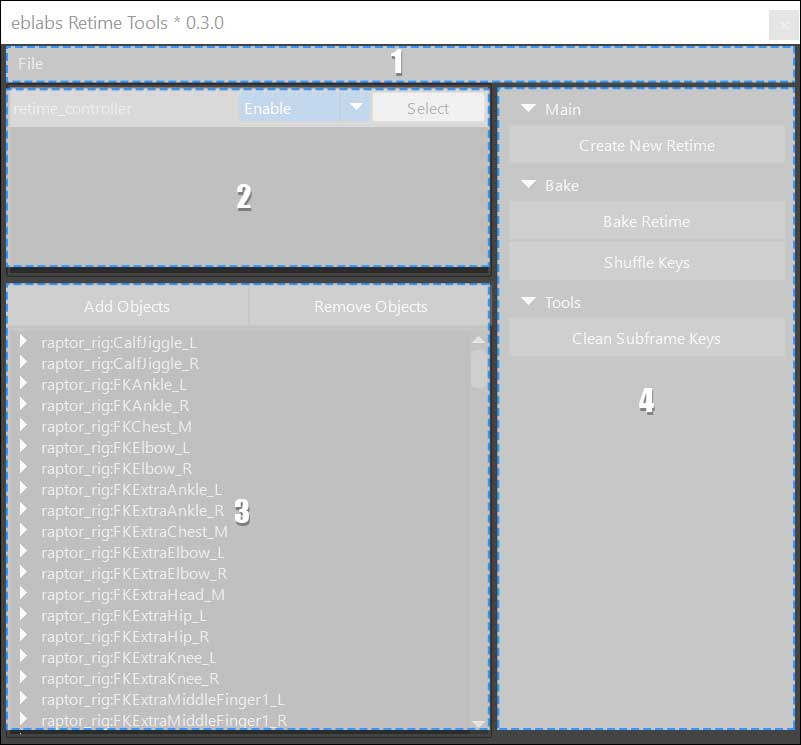
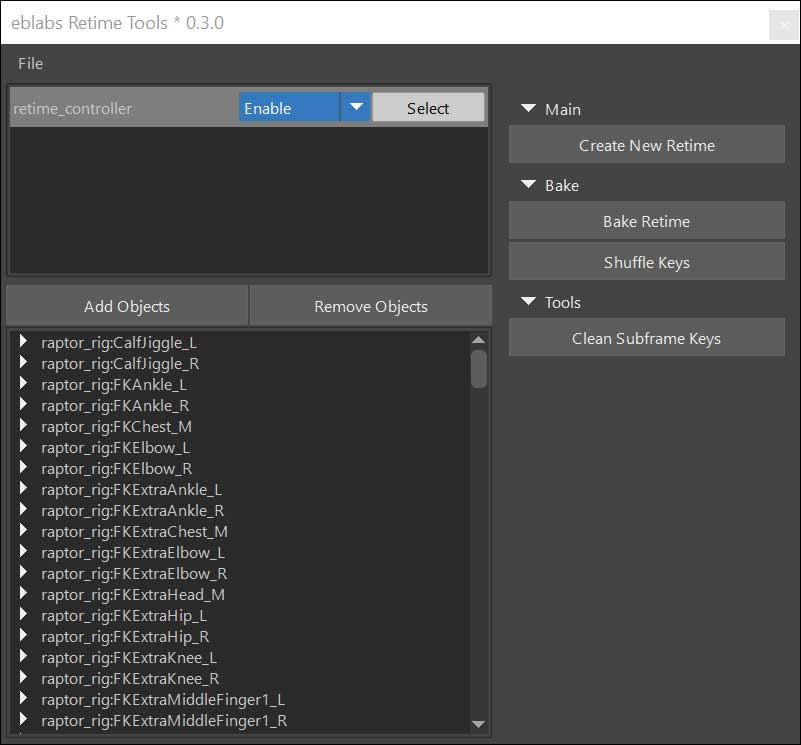
| # | Area | Description |
|---|---|---|
| 1 | Menu Area | Here you can find various menus and options. |
| 2 | Retime Controls | Select and modify retime modes from here. |
| 3 | Objects List | Inspect and modify objects that are connected to the retime. |
| 4 | Tools Area | Various tools for working with Retimes. |
| Item | Description |
|---|---|
| Import/Export | Coming Soon Tools for import and exporting the Retime animation as json so it can be shared with other artists and departments. |
| Item | Description |
|---|---|
| Controls | Here you will see a list of Retime Controls in your scene. Click on a control to display its connections in the Object List. |
| Actions Dropdown Reset | This resets the Retime Control, removing any changes you have made to the retime curve. |
| Actions Dropdown Enable | This enables the Retime Control. |
| Actions Dropdown Disable | This temporarily disables the Retime Control, while staying connected to all of the objects you've added. |
| Actions Dropdown Invert | This "Inverts" the retime curve. This is helpful if you'd like to Un-Retime animation based on a specific Retime curve. |
| Actions Dropdown Disconnect | This safely removes all objects that are controlled by the Retime Control. |
| Actions Dropdown Delete | This removes the Retime Control from your maya scene. |
| Select Button | This will select the Retime Control in your maya scene so you can modify the retime animation. |
| Item | Description |
|---|---|
| Objects | Clicking on a Retime Control above will update the list of objects. Clicking on anything in this list will also select the objects in your Maya scene. |
| Expand | Navigate the tree view to see what objects, channels and animation curves are connected. |
| Add Objects | Select objects in your scene that have animation and click here. This will connect Animation Curves related to your selection to the Retime Control. |
| Remove | Removes the selected items from the list, from the Retime Control. |
| Item | Description |
|---|---|
| Create New Retime | This will make a new Retime Control in your scene. Feel free to rename these and have as many as you like. |
| Bake Retime | This will bake out the retime for the duration of the Retime Control animation. |
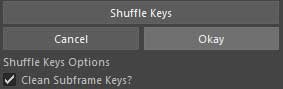
| Shuffle Keys | This will shift around the timing of your existing animation keys based on the Retime Control animation. This is the most animation friendly way to make timing changed to your animation. |
| Clean Subframe Keys | Optional for Shuffle Keys, as well as its own button. If you are shuffling keys its very likely individual animation keys become shifted to sub frames. This tool is a way to clean up these keys by removing duplicates and repositioning keys to whole frames while preserving the animation as best as possible. This is a much better option than using Maya's Snap Keys tool. |
The Package Manager makes installing a simple process, but if you need to do this manually here's how.
Tools should be installed to a common eblabs_hub folder. The install path should be one folder up from the eblabs_hub folder. Make sure that there are blank __init__.py files within all folders.
install_path = 'E:/path/to/maya/scripts'
package_id = 'RetimeTools'

import os
import sys
if not install_path in sys.path:
    sys.path.append(install_path)

import eblabs_hub.RetimeTools.scripts.RetimeTools as tool
w = tool.Window()
w.display()
Adelmo83 (verified owner) –
Fantastic tool, the options “Shuffle Keys and Clean Subframe Keys”, helps a lot in cleaning curves !!!, a recommended tool !!!